Alright, let’s cut to the chase—if you’re reading this, you’re either a first-time DIYer trying to sort out your attic ventilation, a remodeler in need of a refresh, or maybe even another HVAC shop hunting for a solid PVC duct solution. No fluff, no jargon, just the straight talk I’d give you if we were chatting over a coffee about how to actually install our PVC ventilation ducts right. I’m not here to waste your time with corporate scripts; this is the real deal. PVC Ventilation Duct

First, let’s get one thing out of the way: installing PVC ventilation ducting isn’t rocket science, but it’s way different from the flex duct you’ve probably wrestled with before. PVC is rigid, durable, and way less likely to get chewed up by rodents or crumple when you’re shoving it through tight spaces. I’ve seen way too many botched installs that could’ve been avoided with a few basic steps, so let’s walk through this like I’m showing my little cousin how to do it (minus the eye-rolling, I hope).
First up: Gather your gear (no fancy tools required, promise)
Before you even touch a single PVC pipe, let’s make sure you’ve got everything you need—trust me, there’s nothing worse than realizing you’re missing a critical tool mid-install and having to run to the hardware store in the rain. Here’s my go-to list for standard residential installs:
- Our PVC duct sections (I’m talking 4-inch or 6-inch, depending on your space—hit us up if you’re not sure which size you need)
- PVC primer and cement (NOT regular glue—this stuff melts the PVC so it fuses, not just sticks. Super important.)
- A hacksaw or a PVC-cutting tool (we sell these too if you don’t have one, no biggie)
- A measuring tape and marker (obvi)
- A pipe deburrer (or even a piece of sandpaper—this gets rid of the rough edges on cut pipes so they fit smooth)
- A utility knife (for trimming any stubborn burrs, or if you need to notch a pipe to fit around a stud)
- A drill with screwdriver bits (for securing brackets, more on that later)
- PVC pipe hangers/brackets (you need these every 3-4 feet, and within 12 inches of every elbow, tee, or connection point—no exceptions)
- And if you’re venting to the outside, don’t forget a vent cap (the kind with a screen to keep bugs and birds out) and some silicone caulk for sealing the cap to the exterior wall/roof.
Wait, a quick pro tip: don’t skip the deburring step. I’ve had customers cut a pipe, sand it down quick, and then wonder why it leaks air later. The rough inner edge from cutting can restrict airflow, and the outer burr makes it hard to push the sections together all the way. Take 10 seconds to smooth those edges—you’ll thank me later.
Step 1: Map out your run before you cut anything
This is the step most people rush, and it’s where mistakes happen. I’ve lost count of how many times someone calls me panicking because they cut a pipe too short or too long, and now they have to add an extra elbow that messes up the airflow. Here’s how I do it:
First, figure out where your duct is starting (that’s usually your HVAC unit, bathroom exhaust fan, or kitchen range hood) and where it’s ending (the exterior vent cap). Lay out the duct sections on the ground along the path you want to run them, mark each joint, and measure twice. I know, I know, everyone says that—but I literally had a guy last month who cut a 10-foot pipe at 9.5 feet because he measured once, and then had to drive 20 minutes to grab an extra 5-foot section that he didn’t need. Save yourself the gas money.
Also, try to keep your runs as straight as possible. Each elbow you add creates a little bit of airflow resistance, and too many turns can make your system way less efficient. If you have to go around a stud or a joist, use a 45-degree elbow instead of a 90-degree one—it’s way smoother for air to flow through. And never, ever force a pipe into place. If it doesn’t fit, check your measurement—forcing it will crack the PVC, and we all know how well cracked PVC works (spoiler: not well).
Step 2: Cut the PVC to size and prep the joints
Okay, you’ve got your measurements—time to cut. If you’re using a hacksaw, make a straight cut, not a jagged one. A PVC cutter (we sell these, FYI) makes this way easier—just clamp it around the pipe and twist until it cuts through, like a giant pair of scissors. No rough edges, no hassle. Once it’s cut, grab your deburrer (or sandpaper) and smooth both the inside and outside edges of the cut end. Even a tiny burr can stop the pipe from seating all the way, so don’t skip this.
Now for the joints. Every connection needs to be primed and cemented—this is non-negotiable. Here’s how to do it right:
First, take a dry run of the joint (no primer/cement yet) to make sure it fits. If it’s too loose, you might need a bigger fitting, or you can wrap a little Teflon tape around the end (but that’s a last resort—priming and cement should make a tight fit). Once it’s good, wipe the outside of the pipe end and the inside of the fitting with a rag to get rid of any dust or grease—primer and cement don’t stick well to dirty surfaces.
Next, apply a thin, even coat of primer to both the outside of the pipe end and the inside of the fitting. Don’t glob it on—too much primer causes bubbles that weaken the joint. Wipe off any excess primer immediately. Then, do the same with the PVC cement: thin, even coat on both parts. Here’s the key: you have about 10 seconds before the cement starts to set, so push the pipe all the way into the fitting and twist it a quarter turn. This spreads the cement evenly and ensures a tight seal. Hold it for 30 seconds—don’t let go right away, or it might pull apart. And don’t touch the joint for at least 15 minutes before moving on—wait 24 hours before testing airflow, just to be safe.
Quick heads up: PVC primer and cement smell, so make sure you’re working in a well-ventilated area. No need to wear a hazmat suit, but open a window or a door—your nose will thank you, and you won’t risk breathing in fumes.
Step 3: Secure your duct with hangers (this is why your install lasts)
I can’t stress this enough—skipping hangers is the #1 reason PVC ducting falls down or develops leaks over time. Rigid PVC is heavy, especially when it’s full of air, so it needs support every 3-4 feet, and within a foot of every elbow, tee, or joint. If you’re running it along ceiling joists or wall studs, use the U-shaped hangers that screw into the wood. If you’re running it in an attic where you can’t attach to studs, get the adjustable hangers that clamp to the rafters—just make sure they’re tight enough so the pipe doesn’t sag.
Sagging is a big no-no. If your duct sags even a little, it can trap moisture, which leads to mold and mildew. That’s not something you want growing in your walls or attic, trust me. I’ve seen installs where someone just laid the duct on the attic floor, and a year later it’s covered in dust and mold—total waste. Take the extra 10 minutes to add hangers, and your duct will last decades, not a couple of years.
Step 4: Seal the exterior vent (don’t let bugs or air escape)
If you’re running your duct to the outside, that final vent cap is where you have to be extra careful. First, cut a hole in the wall or roof (make sure you’re not cutting through any electrical wires or plumbing pipes—use a stud finder!) and attach the vent cap. Then, use silicone caulk around the edge of the cap where it meets the wall/roof. This seals out rain, wind, and bugs. Also, make sure the vent cap has a backdraft damper—this is the little flap that closes when the system isn’t running, so outside air doesn’t come in and mess up your indoor temperature.
Wait, one more thing: if you’re venting through a roof, make sure you use a roof flashing kit, not just caulk. Caulk on a roof can crack and fall apart after a few years, but flashing creates a permanent seal that keeps water out. I’ve seen way too many roof leaks that started because someone didn’t use proper flashing for their vent cap—don’t be that guy.
Common mistakes I see all the time (avoid these!)
Let’s wrap this up with the stuff that gets people in trouble, okay? First, never use regular glue or silicone instead of PVC cement. Regular glue doesn’t fuse the pipes—it just sticks them, so air will leak out. Silicone is for sealing the outside, not the joints. Second, don’t use too many 90-degree elbows. Like I said earlier, they kill airflow. If you have to turn, use 45s, or even a long sweep elbow for super tight spaces. Third, don’t skip the deburring step. It’s 10 seconds of work that saves you from headaches later. And finally, don’t cut corners on hangers. They’re cheap, and they keep your duct from falling apart.
Wrapping it up & how to work with us
Look, I know this sounds like a lot, but once you do it once, it’s pretty straightforward. Our PVC ventilation ducts are made to be easy to install, durable, and way more reliable than other duct types. If you’re not sure what size you need, or how many sections to order, just reach out—we’ll help you figure it out. We’ve worked with DIYers, contractors, remodelers, everyone, so we know what works.
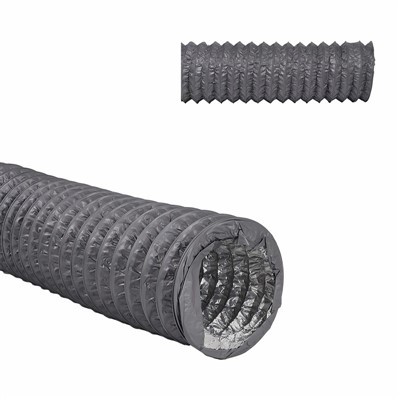
If you need bulk orders for a big project, or just a few pieces for a small bathroom exhaust, we’ve got you covered. No hidden fees, no weird minimums, just solid PVC ducts that do the job they’re supposed to. If you have questions during your install, feel free to hit us up too—we’re here to help.
Aluminum Foil Tube So next time you need PVC ventilation ducts, don’t go for the cheap stuff that’ll fall apart in a year. Grab ours, follow these steps, and you’ll have a system that works for years. Reach out to us to chat about your order, whether it’s a small residential job or a large commercial build. We’re here to make sure your ventilation project goes smoothly, no stress.
References
- ASHRAE Handbook—HVAC Systems and Equipment, American Society of Heating, Refrigerating and Air-Conditioning Engineers, Inc.
- PVC Ducting Installation Guidelines, Plastic Pipe and Fittings Association.
- Residential Ventilation Best Practices, U.S. Department of Energy.
Address: NO.5 CHENGDONG ECOLOGICAL INDUSTRIAL ZONE, DONGYANG, ZHEJIANG, CHINA.
E-mail: sales@hstube.com
WebSite: https://www.ductword.com/
