Hey there, thanks for stopping by. If you’ve been eyeing those sleek, affordable MDF ceiling panels to give your space a fresh upgrade, you’re in the right place. As someone who’s been in the MDF supply game for years—literally, I’ve fielded every “will this panel work for my bathroom?” and “how do I not mess up the installation?” question under the sun—I’ve learned that installing MDF ceilings isn’t rocket science, but it does have a few little tricks that make the difference between a botched weekend project and something you’ll brag about to your friends for months. Let’s break this down step by step, no fancy jargon, just real talk from someone who’s seen it all. MDF

First off, before you even touch a panel, you gotta prep right. I can’t tell you how many people skip this part and end up with warped panels that look like they were left out in a rainstorm. Wait—if you’re working with new MDF panels, especially if you’re buying them from a supplier like me (no plugs here, promise), you need to acclimate them to your space for at least 48 hours. That means leaving them flat in the room where they’ll be installed, not stacked in a garage or the back of a truck. MDF is porous, so it expands and contracts with humidity and temperature, and yanking it straight from a dry warehouse to a steamy bathroom is a one-way ticket to B panel city. Also, while you’re at it, check the room itself. Is your ceiling smooth? Any big holes, water stains, or loose drywall? Fix that stuff first. If you’ve got popcorn ceilings, you’ll probably want to skim coat them flat or use furring strips later to give the panels something solid to attach to. And don’t forget to measure—twice, at least. I’ve lost count of how many folks buy panels that are too short because they rounded up their tape measure reading. MDF cuts easy, but it’s way easier to cut a panel that’s a hair too long than a hair too short.
Next, round up your tools and supplies. You don’t need a shop full of fancy gear, but skimping on the basics will slow you down and maybe cause mistakes. Let’s list the must-haves: a tape measure (a retractable one, not that old 10-foot thing your dad uses that sticks halfway), a circular saw or a jigsaw—pro tip, a circular saw with a fine-tooth blade will give you cleaner cuts, but a jigsaw works fine for smaller cuts around lights or vents, a stud finder (non-negotiable—you can’t just nail MDF to drywall every time), level (a 4-foot level is perfect for ceilings, not the tiny torpedo one), caulk gun and paintable latex caulk, screws or adhesive? Wait—let’s talk about that choice, because it’s a big one. If you’re doing a full ceiling install, you’ve got two main options: mechanical fasteners (screws or nails) or construction adhesive. Both work, but I usually recommend a mix for most people. Adhesive gives you instant hold, and then a few screws every couple feet keeps it from shifting if the wall shifts a bit later. If you’re only doing a small section, adhesive alone is fine, but for full ceilings, I swear by the combo. Also, grab some furring strips—1×2 or 1×3 strips, depending on how flat your ceiling is—those are key if your existing ceiling is bumpy or if you’re doing a suspended (drop) MDF ceiling. Oh, and don’t skip the safety gear: safety glasses, gloves, and a dust mask. MDF dust is fine, and you don’t want that crud in your lungs or in your eyes. Trust me.
Once you’re prepped and ready, it’s time to set up your work area and figure out your layout. This is where people mess up the most, trust me. You don’t wanna end up with a tiny sliver of panel at the edge of your room that looks stupid. Start by snapping a chalk line down the center of your ceiling—so it’s exactly halfway between two opposite walls. That way, you can work out from the center, and the panels on each side will be equal size. If that means cutting a panel at the end that’s a little narrower, that’s way better than having a tiny cut on both ends. If you’re using furring strips, now’s the time to install them. Attach the strips to your ceiling joists, making sure they’re level, and space them 16 inches apart on center— that’s standard for ceiling work, so the panels will have something solid to attach to. If you’re dealing with an existing drywall ceiling that’s solid, you can skip the furring strips, but still make sure you’re hitting the joists when you fasten—drywall alone isn’t enough to hold MDF long-term.
Now, let’s talk about cutting the panels. This is where accuracy matters. If you measured twice already, good, now mark your cut line clearly with a pencil and a straightedge—don’t just freehand it, you’ll end up with a wavy cut that doesn’t fit. For straight cuts, a circular saw is your best bet, but set the saw blade depth just deep enough to cut through the panel, not all the way through the base of your saw—prevents splintering. If you’re cutting a panel face-down, the top side (the good side) will be on the bottom, so you’ll get a cleaner edge. For cuts around light fixtures, vents, or any obstructions, measure the distance from the edge of the panel to the center of the hole, mark it, and use a jigsaw to cut out the shape. Take it slow here—jigsaws can veer if you rush, leading to gaps you’ll have to fill later. Pro tip: if you’re working with primed MDF (which most people use, since it’s ready to paint), do all your cutting before you prime or paint the edges? Wait no—actually, prime all cut edges right after you cut. MDF absorbs moisture like a sponge, and unprimed edges are the first place you’ll see warping or water damage. Don’t skip that step—slap on a coat of primer to the cut sides before you even think about installing.
Okay, time for the fun part—putting the panels up. Start at that center chalk line we talked about. If you’re using adhesive, apply a zig-zag line across the back of the panel, plus a few blobs in the middle, don’t just spread a thin layer all over. That prevents oozing out the edges. Lift the panel up to the ceiling, line it up with the chalk line, and press it firmly into place. Use your level to make sure it’s straight, and have a friend help you hold it if you can—lifting a 4×8 panel solo is no joke, and you’ll drop it or mess the alignment. If you’re using screws, drive them in every 12 to 16 inches, right into the joists or furring strips. Make sure the screws are countersunk— meaning they go just below the surface of the MDF, so you can fill the hole with putty later, no bumps. For the next panel, butt it right up against the first one, no gaps— MDF edges are machined pretty smooth, so they should fit tight. If there’s a tiny gap (like a 1/32 of an inch or less), that’s fine, you can fill it later with caulk. Work your way out from the center to the walls, cutting the end panels to fit as you go. When you get to the edges, if you have to trim a panel to fit, use a small level or a straightedge to make sure it’s aligned with the walls, not just the ceiling—walls aren’t always perfectly straight, so you might have to adjust the cut a hair to make it look even.
Once all the panels are up, it’s time for the finishing touches, which will make the whole thing look professional, not like a weekend project. First, fill all the screw holes and any tiny gaps between panels with MDF putty or paintable caulk. Smooth it out with your finger or a putty knife, let it dry completely, then sand it lightly with fine-grit sandpaper (220 grit works great) so it’s flush with the panel surface. Wipe off all the dust with a tack cloth—if you leave dust here, it’ll show up when you paint, and there’s nothing worse than a dusty paint job. Then, if your panels aren’t already primed and painted, now’s the time. Use a high-quality latex primer first, then two coats of paint. Make sure you let each coat dry fully, and lightly sand between coats for a smooth finish. If you’re doing a decorative ceiling, you can also add trim along the edges where the ceiling meets the walls—quarter round or crown molding works great, it hides any small gaps and gives it a finished look.
Wait, before you start, a few quick do’s and don’ts that I’ve learned from answering tons of questions over the years. Don’t use MDF in areas that get super high moisture, like a shower ceiling or a basement bathroom that doesn’t have good ventilation. MDF can handle regular humidity, but constant exposure to water will make it swell. If you do want MDF in a bathroom, make sure it’s properly sealed with a waterproof paint or sealant. Don’t rush the installation—taking an extra day to measure twice and acclimate panels is way better than having to rip the whole thing out because something doesn’t fit right. And don’t skip the priming of cut edges—seriously, that’s the #1 mistake new DIYers make that leads to warped panels a few months later.
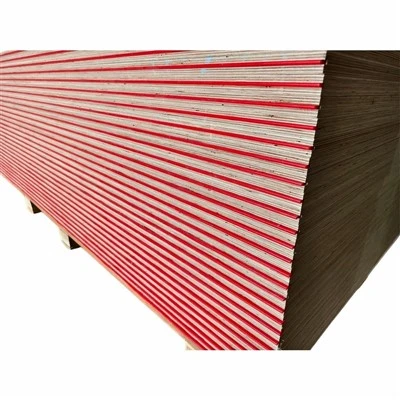
If you’re still on the fence about MDF ceiling panels, or if you need help picking the right type for your space (we’ve got different thicknesses, primed vs unprimed, smooth vs textured), hit us up for a chat. Whether you’re a DIYer doing your first space or a contractor working on a bigger project, we can help you pick the right panels, share more tips, or work out what you need to get the job done right. No pressure, just real advice from a supplier who cares about making sure you end up with a ceiling you love, not a headache.
Film Faced Plywood References:
- National Wood Flooring Association. Guide to MDF Installation for Residential Interiors, 2021.
- Woodworking Network. Best Practices for Acclimating Composite Wood Building Materials, 2022.
- Home Improvement Research Institute. DIY Installation Tips for Decorative Ceiling Panels, 2023.
- Composite Panel Association. MDF Handling and Finishing Guidelines, 2020.
Shandong Rogge Wood Industry Co., Ltd.
Address: No.1 Road, Jinyang Village, Huyang Town, Felxlan County, Linyi City, Shandong China.
E-mail: sales@roggewood.com
WebSite: https://www.roggewood.com/
