Calibrating a rivet gun is a crucial process for ensuring its optimal performance and the quality of riveting work. As a rivets supplier, I’ve witnessed firsthand the importance of a well – calibrated rivet gun in various industries, from automotive manufacturing to aerospace engineering. In this blog post, I’ll guide you through the steps of calibrating a rivet gun, sharing insights based on my years of experience in the rivets business. Rivets

Understanding the Basics of a Rivet Gun
Before we dive into the calibration process, it’s essential to understand how a rivet gun works. A rivet gun is a tool used to install rivets, which are permanent mechanical fasteners. The gun typically consists of a handle, a trigger, a nosepiece, and a mandrel collection system. When the trigger is pulled, the gun pulls on the mandrel of the rivet, causing it to expand and form a second head, thus securing the rivet in place.
The accuracy of a rivet gun’s operation depends on several factors, including air pressure (for pneumatic rivet guns), the force applied by the gun, and the alignment of its components. Calibration ensures that these factors are properly adjusted to achieve consistent and reliable riveting results.
Pre – calibration Checks
Before starting the calibration process, it’s important to perform a few pre – checks. First, inspect the rivet gun for any visible signs of damage, such as cracks in the handle, loose parts, or worn – out nosepieces. If any damage is found, it should be repaired or replaced before calibration.
Next, clean the rivet gun thoroughly. Remove any dirt, debris, or old rivet shavings from the nosepiece, mandrel collection system, and other parts of the gun. A clean gun not only functions better but also provides more accurate calibration results.
For pneumatic rivet guns, check the air supply. Make sure the air compressor is working properly and that the air pressure is within the recommended range for the rivet gun. You can use a pressure gauge to measure the air pressure at the gun’s inlet.
Step – by – Step Calibration Process
1. Set the Air Pressure (Pneumatic Rivet Guns)
If you’re using a pneumatic rivet gun, the first step in calibration is to set the correct air pressure. Refer to the manufacturer’s specifications for the recommended air pressure range for the type of rivets you’ll be using. Different rivets require different levels of force to install, and the air pressure directly affects the force applied by the gun.
To set the air pressure, connect the rivet gun to the air compressor using an air hose. Use a pressure regulator to adjust the air pressure. Start by setting the pressure to the lower end of the recommended range. Then, test the gun by installing a few rivets. If the rivets are not properly installed (e.g., the mandrel doesn’t break off cleanly or the rivet doesn’t expand enough), gradually increase the air pressure in small increments until the rivets are installed correctly.
2. Adjust the Force Setting
For hydraulic or electric rivet guns, the force setting can usually be adjusted using a control knob or a digital display. Similar to setting the air pressure for pneumatic guns, refer to the manufacturer’s guidelines for the appropriate force setting based on the rivet size and material.
Start with a lower force setting and test the gun by installing rivets. If the rivets are under – installed, increase the force setting. If the rivets are over – installed (e.g., the material around the rivet is damaged), decrease the force setting. Make small adjustments and test the gun after each adjustment until you achieve the desired riveting results.
3. Check the Nosepiece Alignment
The nosepiece of the rivet gun is responsible for holding the rivet in place during installation. A misaligned nosepiece can cause the rivet to be installed at an angle or not fully seated, leading to weak connections.
To check the nosepiece alignment, insert a rivet into the nosepiece and visually inspect it. The rivet should be centered and straight within the nosepiece. If the rivet is not aligned properly, loosen the nosepiece retaining screw and adjust the nosepiece until the rivet is centered. Then, tighten the retaining screw.
4. Test the Mandrel Collection System
The mandrel collection system is designed to collect the broken – off mandrels after rivet installation. A malfunctioning mandrel collection system can cause mandrels to get stuck in the gun, affecting its performance.
To test the mandrel collection system, install a few rivets and observe how the mandrels are collected. If the mandrels are not being collected properly or are getting stuck, check for any blockages in the collection tube or the collection chamber. Clean out any debris and ensure that the collection system is properly connected to the gun.
Post – calibration Testing
After completing the calibration process, it’s important to perform a post – calibration test to ensure that the rivet gun is working correctly. Select a sample of rivets that are representative of the type and size you’ll be using in your actual work.
Install a series of rivets in a test piece of material that is similar to the material you’ll be working with in your project. Check the quality of the riveted connections. The rivets should be properly installed, with the mandrels breaking off cleanly at the appropriate point. The rivets should also be flush with the surface of the material and provide a strong, secure connection.
Measure the length of the installed rivets. The length should be consistent within an acceptable tolerance range. If the rivet lengths vary significantly, it may indicate that the calibration was not successful, and you may need to repeat the calibration process.
Troubleshooting Common Calibration Issues
Even with careful calibration, you may encounter some common issues. Here are a few troubleshooting tips:
Rivets not expanding enough: Check the air pressure (for pneumatic guns) or the force setting (for hydraulic/electric guns). Increase the pressure or force slightly and test again. Also, make sure that the rivet size and material are compatible with the gun.
Mandrels not breaking off cleanly: This could be due to incorrect air pressure, a misaligned nosepiece, or a dull cutting edge in the gun. Check the air pressure and nosepiece alignment. If the cutting edge is dull, it may need to be sharpened or replaced.
Rivet gun jamming: A jammed rivet gun can be caused by dirty components, a blockage in the mandrel collection system, or a misaligned nosepiece. Clean the gun thoroughly, check and clear any blockages in the collection system, and ensure that the nosepiece is properly aligned.
Conclusion
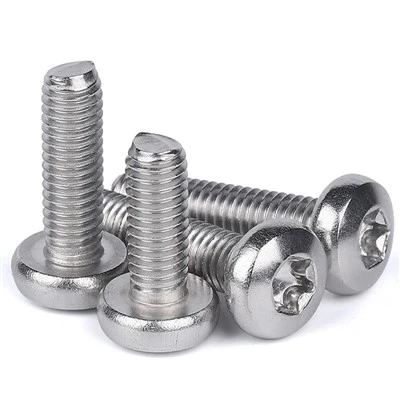
Calibrating a rivet gun is a skill that can significantly improve the quality and efficiency of your riveting work. As a rivets supplier, I understand the importance of having a well – calibrated rivet gun to ensure that the rivets we supply are installed correctly. By following the steps outlined in this blog post, you can calibrate your rivet gun with confidence and achieve consistent, high – quality riveting results.
Screws If you’re in the market for high – quality rivets or have any questions about rivet gun calibration or rivet selection, I encourage you to reach out to us for a procurement discussion. Our team of experts is always ready to assist you in finding the right solutions for your riveting needs.
References
- Manufacturer’s manuals for various rivet guns
- Industry standards for riveting processes
- Technical papers on fastener installation and quality control
Changzhou Unilee Fastening Technology Co., Ltd.
With abundant experience, we are one of the most professional rivets manufacturers and suppliers in China. Please feel free to buy premium rivets made in China here and get pricelist from our factory. All customized products are with high quality and competitive price.
Address: Building 32, No.158, Jinchuang Road, Economic Development Zone, Changzhou City, Jiangsu Province
E-mail: vitatree.cn@gmail.com
WebSite: https://www.unileefastener.com/
